Service Line and House Check
Step-by-Step Instructions
A service line is an underground pipe that carries water from your meter to your home.
Step One
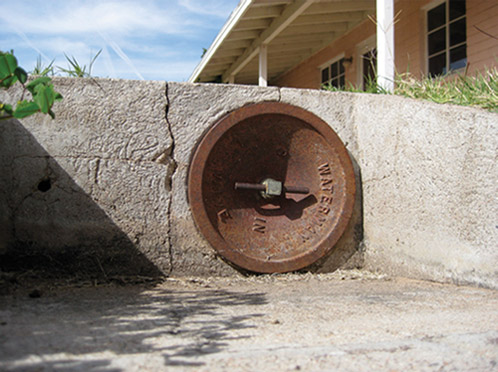
Find your water meter. Most residential water meters are located near the curb or sidewalk at the front of the property in a concrete "box." The box will have a metal or plastic lid and may be marked, "Water Meter." Carefully lift the cover and check for leaks.
Continue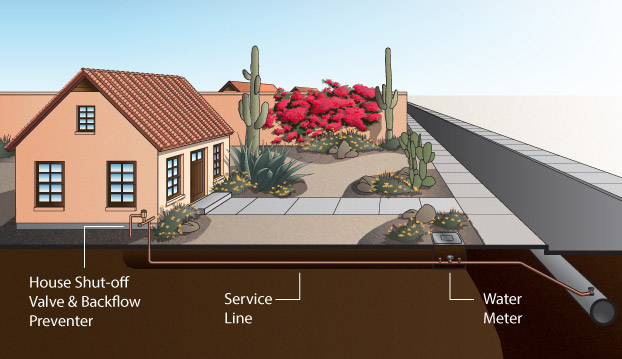
Step Two
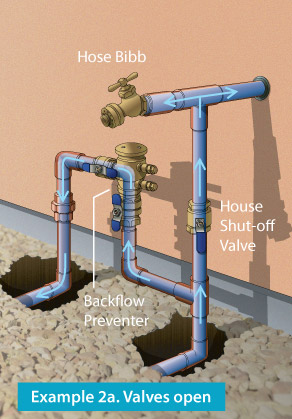
Find the house (main) shut-off valve on the water supply riser, generally located in the front or on the side of the house below the hose bibb. (See examples 1a and 2a for two typical set-ups.) Check for leaking water around exposed pipes and valves.
Step Three
Visually inspect your property between your house shut-off valve and your water meter. A wet spot, small hole or depression may indicate an underground leak in the service line. Refer to Service Line Check (Section 4) if you suspect a leak in your service line.
Step Four
Check all other hose bibbs and/or outdoor faucets for dripping water and/or wet spots.
Next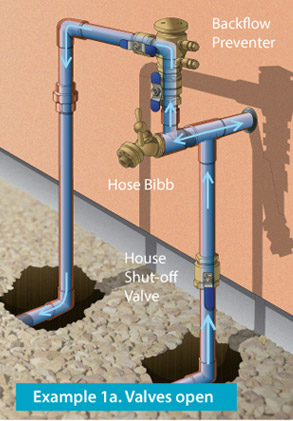
Irrigation Systems
The most common leaks found around the home occur in the irrigation system. A typical irrigation system consists of a backflow prevention device, valves, underground pipes, emitters and/or sprinkler heads and an irrigation controller.
Step-by-Step Instructions
First, walk around your property to look for leaks. Check the backflow prevention device, the irrigation valves and look for wet spots, small holes and depressions, as these may indicate an underground leak.
Next, run the irrigation system and walk around your property again to look for leaks that only occur when the system runs. Use the checklists below.
Backflow Prevention Device
A backflow prevention device protects drinking water from contamination due to backflow. Backflow can occur when the water system pressure decreases (such as in the case of a water main break). Begin your check for irrigation system leaks at the backflow prevention device, generally located near the house shut-off valve.
Inspect backflow prevention device for leaks.
Occasional dripping or squirting may indicate that backflow prevention occurred and might not necessarily be a leak.
A puddle of water on the ground or continuous dripping may indicate a leak or possible failure of the backflow prevention device.
Continue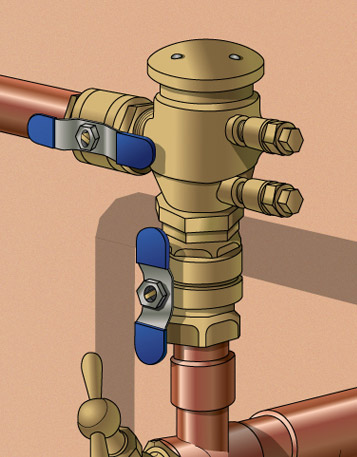
Irrigation Valves
Inspect irrigation valves for signs of leaks, such as mud or standing water, in the irrigation valve box.
Check sprinkler heads when they are not running. Continuous seeping often indicates a malfunctioning valve. Valves can fail over time or debris (rocks, dirt, etc.) can prevent the valve from closing properly.
Next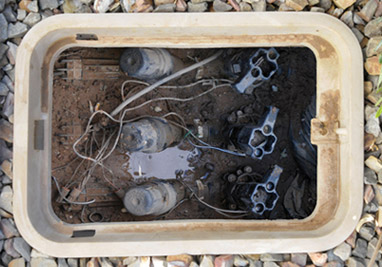
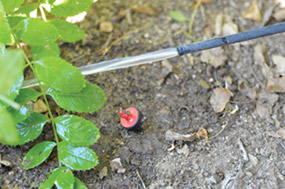
Sprinkler Heads, Bubblers and Drip Irrigation
Visually inspect equipment and property:
Look for missing or broken drip irrigation emitters or cracked tubing. (Water should trickle rather than squirt from emitters.)
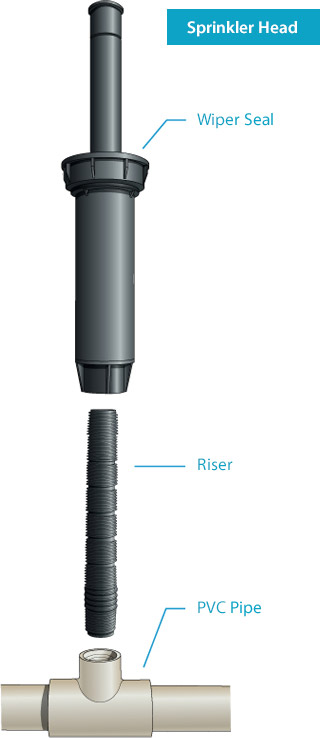
Check wiper seals between the neck and base of the sprinkler heads. (Water will seep out of a worn seal.)
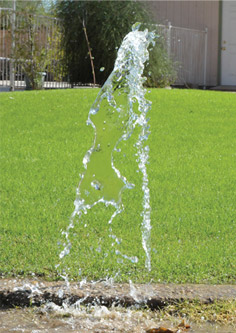
Look for missing or broken sprinkler heads or cracked riser pipes.
Check for missing or broken bubblers or cracked riser pipes.
Inspect your yard for wet spots, small holes or depressions, as these may indicate an underground water leak.
Did You Know?
According to EPA WaterSense, an irrigation system that has a leak 1/32nd of an inch in diameter (about the thickness of a dime) can waste about 6,300 gallons per month.
Swimming Pools and Spas
Pool water evaporation is normal; however, an abnormal drop in water level may indicate a leak. An autofill (automatic pool water leveler) can mask a leak as it will automatically replace water lost and thereby prevent a visible drop in pool level.
Step-by-Step Instructions
Step One
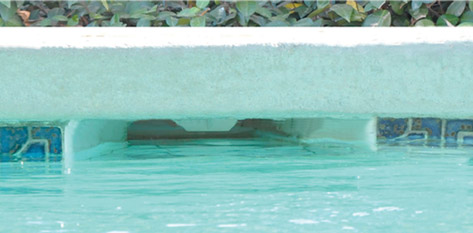
Check the pool and/or spa autofill for proper operation:
Look at the pool water level. The autofill should keep the pool water level at the middle of the skimmer box opening. If the water level is too high, excess water can escape through gaps under the decking at the top of the pool or through the autofill crock (container in which the autofill sits).
Check the autofill to see if it can stop the water flow. If your autofill is allowing water to flow through it, gently lift its float to see if the flow stops.
Check the float. If set too high, it will cause a higher than desired pool water level.
Step Two
Check the pool and/or spa system equipment:
Note pool level, and then turn on pool equipment. A drop in water level may indicate a leak.
Visually inspect equipment, especially around pipe joints. Walk from the pool equipment to the pool, to the water supply line (if you have an autofill) and around the pool. Look for any wet spots, small holes or depressions in the soil, as these might indicate an underground water leak.
next
The Bucket Test
If you have not located your leak and you have checked around your home, consider a Bucket Test if you suspect a leak in your pool system.
- Disable (turn off) the autofill (if present).
- Place a bucket or container on a pool step without submerging it.
- Use a large rock or brick to weigh down the container.
- Fill it with water so it is the same level as the pool water.
- Mark the water level inside the bucket.
- Mark the pool water level on the outside of the bucket.
- Wait at least two to three days to let natural evaporation occur.
Compare the two water levels.
A. If the pool water level (outside mark) dropped more than the bucket's water level (inside mark), you may have a leak and may want to contact a pool contractor.
B. If the level changes are the same, only evaporation has occurred.
Resume normal autofill operation.
Next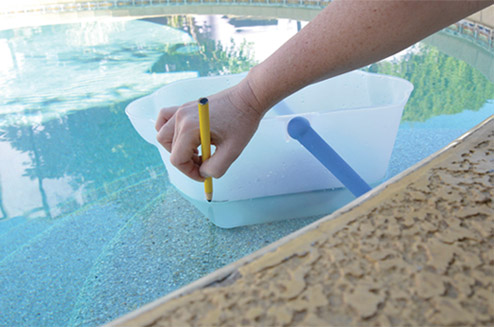
Important!
Be sure to check pool level more frequently during summer months!
Fountains and Water Features
Step-by-Step Instructions
Check for leaks or cracks on water supply lines and pipes.
Look for structural cracks or damaged basins.
Adjust autofill to avoid basin overfill.
Flood Irrigation
Step-by-Step Instructions
Visually inspect your flood irrigation berm integrity to ensure irrigation water stays on property.
Check for clogged gates or trenches.
Make sure ditches are clear of weeds and obstructions.
Clean any gates in your system before and during your water delivery.
Regularly maintain your yard valves or gates.
Keep yard valves and gates tightly closed unless irrigating.
Contact your irrigation water provider for additional questions.